
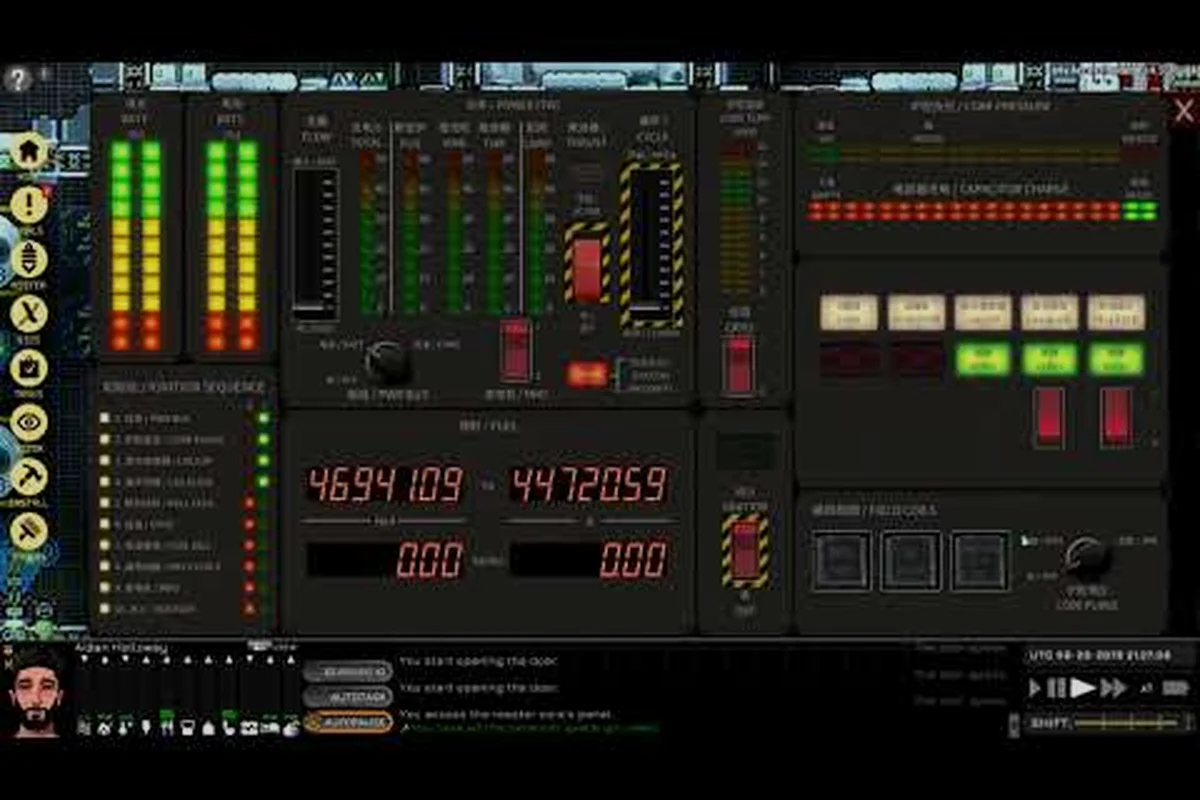
Reactor Fundamentals in Ostranauts
Every ship that flies out of K-Leg Station needs a reactor, and your early-game starter hull is no exception. The Ostranauts reactor guide starts here because the power core is the single most important part on any vessel: it feeds the thrusters, the life-support scrubbers, the grav-compensators, and every gun or tool you wire into the grid. When a reactor dies mid-flight, the cascade kills crew morale, hull integrity, and your credit balance in a hurry. Get the plant right and the rest of your build becomes much easier to manage.
A reactor in Ostranauts is a room-sized module you bolt onto your ship's modular grid. It draws fuel, generates electrical power, and produces waste heat that has to be vented or cooled. Because the game simulates Newtonian physics and a real-time crew need loop, ignoring your reactor means brownouts, frozen pilots, and silent comms at the worst possible moment. This is the part of the Ostranauts reactor guide where most new captains pay for skipping tutorials, so plan before you weld.
Before you swap parts, take a look at how reactors interact with the rest of your build:
- Power grid – every consumer (engines, shields, sensors, lights) draws watts; if total draw exceeds output, systems brownout in priority order
- Fuel storage – reactors consume solid, liquid, or gaseous fuel depending on type; you need compatible tanks adjacent or hard-linked
- Heat signature – reactors radiate heat that warms nearby rooms; crew comfort and component wear both degrade with sustained high temperature
- Crew operation – some reactors need a trained engineer on shift to run safely; unattended cores can drift into failure states
- Grid space – reactors occupy 1×1 to 3×3 cells depending on class; placement constrains how you arrange the rest of the hull
These five vectors are why a "best reactor" answer rarely exists — the right choice depends on what your ship is doing and where it is going. Players who chase maximum wattage without checking fuel logistics usually end up stranded in a derelict belt with a dead core and a very angry crew. Every veteran captain reading this Ostranauts reactor guide has lost at least one ship to bad planning, so treat fuel and heat as seriously as you treat the core itself.
Reactor Types and Power Output
The current build of Ostranauts ships with three broad reactor families, each representing a different era of in-universe engineering. Class is selected from the ship-building menu and confirmed on the part card before installation, and each family behaves very differently once flight operations begin.
Standard Fusion Cores
Fusion reactors are the workhorse choice for most early-game hulls salvaged from K-Leg. They run on deuterium pellets stored in adjacent solid-fuel lockers, output a steady 30–45 kW depending on tier, and tolerate moderate heat buildup without instant failure. A Tier 1 fusion core costs roughly 8,000 credits new, but the same part shows up frequently on ripped hulls during salvaging runs, so most players start with a used core rather than buying fresh.
Fusion cores are forgiving in ways that newer captains appreciate:
- Heat cut-off sits around 600 K, giving a wide safety margin
- Fuel consumption runs about one pellet per three in-game days under nominal load
- They pair cleanly with the Mk II radiators you can pull off derelict freighters
- No trained engineer required for steady-state operation
Drawbacks include bulky size (2×2 cells for the entry model) and limited peak output, which becomes painful when you stack high-draw systems like pulse shields or a mining laser array. Once you start running more than three high-draw rooms at once, the fusion core will ask you to make hard choices about which system gets priority during a spike.
Fission-Burner Modules
Fission-burner reactors deliver double the peak wattage of a fusion core of equivalent size, but they eat enriched uranium rods and run hot. Community testing places their steady output between 70–95 kW, with a heat ceiling near 900 K before automatic scram triggers.
Fission-burners shine in combat-focused builds:
- Smaller footprint per kilowatt than fusion (often 1×2)
- Excellent transient response for shield spikes and burst-thrust maneuvers
- Compatible with military surplus parts dropped by patrol derelicts
- Faster recharge for capacitor banks feeding energy weapons
The downsides are real: uranium rods are expensive, scarce outside black-market stations, and produce radiation that slowly damages crew if vents are not routed correctly. New players should treat fission-burners as a mid-game upgrade rather than a day-one install, especially if the crew is still learning basic damage control drills.
Antimatter Reactors (Endgame)
Antimatter reactors are the rarest and most powerful core family, capable of 150+ kW sustained output. They consume antimatter pods harvested from late-game derelicts and require shielded containment rooms to operate safely. According to community data, these cores are the only practical choice for capital-class hulls carrying multiple turrets, sensor suites, and crew quarters for six or more NPCs.
| Reactor Type | Peak Output | Fuel Type | Heat Ceiling | Footprint | Skill Requirement |
|---|---|---|---|---|---|
| Fusion (Tier 1–3) | 30–45 kW | Deuterium pellets | ~600 K | 2×2 to 3×2 | None |
| Fission-Burner | 70–95 kW | Enriched uranium | ~900 K | 1×2 to 2×2 | Engineer (Basic) |
| Antimatter | 150+ kW | Antimatter pods | ~1200 K | 3×3 | Engineer (Master) |
Picking the right family depends on hull size, mission profile, and how much heat dissipation you are willing to design around. Many captains in this part of the Ostranauts reactor guide underrate the antimatter class because of the steep supply chain, but for sustained exploration runs it remains unmatched once you have a reliable pod source.
Fuel Logistics and Heat Management
A reactor without fuel is dead weight, and a fueled reactor without cooling is a bomb. Both halves of this equation deserve attention before you ever undock from K-Leg, because they dictate how far you can push the rest of the build.
Fuel Storage Rules
Every reactor draws from an adjacent or hard-linked fuel locker. The game engine treats fuel cells as separate parts, so a reactor will not run unless the locker contains at least one unit of compatible fuel. Storage rules worth remembering:
- Solid-fuel lockers hold pellets and rods; capacity scales with part tier
- Liquid-fuel tanks store refined deuterium slurry for industrial cores (uncommon in vanilla but present in some mods)
- Gas cylinders carry antimatter pods and specialty propellants
- Lockers adjacent to the reactor feed automatically; remote lockers require an engineer to route flow manually
Running out of fuel mid-jump is one of the most common ways crews die in the belt, so most experienced players keep at least one backup locker on the opposite side of the hull. If the primary locker ruptures under fire or depressurizes, that second reservoir buys the crew enough time to vent the affected room and reroute the fuel line.
Heat Dissipation
Heat is the silent killer of any power core. The game tracks reactor core temperature in Kelvin and applies penalties as it climbs past 70% of the ceiling. Above 80%, solder joints begin to fail; above 90%, the reactor may trigger emergency scram and lose all output until manually reset. This section of the Ostranauts reactor guide is the one captains remember after their first brownout.
| Heat Range | Status | Effect |
|---|---|---|
| 0–60% of ceiling | Nominal | Full output, no wear |
| 60–80% | Warm | Minor wear, +5% fuel draw |
| 75–90% | Hot | Crew discomfort, part wear accelerates |
| 90–100% | Critical | Auto-scram risk, possible breach |
| >100% | Meltdown | Reactor destroyed, hull damage |
Cooling comes from radiator panels mounted on the hull exterior, internal coolant loops, and good old-fashioned ventilation to vacuum. Radiators are the most efficient option; place them on the outer skin with no adjacent internal rooms and they shed heat passively. Internal radiators work but at reduced efficiency. Players running heavy reactors should budget at least 25–30% of total hull surface area for radiator coverage, based on community testing shared across the official wiki's ship-building reference.
Installation and Grid Placement
Reactor placement is not a vanity decision. The grid-based building system rewards thoughtful layout, and a poorly placed core creates problems that are expensive to fix later. A common rookie mistake is bolting the core wherever it fits and then trying to solve heat issues with extra radiators — usually after a mid-flight meltdown has already cost a hull.
Room Adjacency
Reactors need airflow, access corridors, and fuel lockers nearby. A core buried deep inside the hull with no adjacent vent ports will trap heat and cook the surrounding rooms. Best practices from veteran shipwrights:
- Place the reactor on a hull edge with at least one outer-facing wall for direct vacuum venting
- Keep fuel lockers in the same 2×2 neighborhood for automatic refuel
- Reserve an adjacent slot for an engineering station if the core requires a crew operator
- Avoid stacking the reactor directly above crew quarters unless you want hot bunks and low morale
Wiring and Power Distribution
Every room connected to the reactor via the grid becomes part of the power network. The game auto-routes electricity along the shortest conductive path, but you can install bus bars and power conduits to push extra capacity to high-draw rooms like the bridge or weapons bay. Players building sensor-heavy exploration vessels often run a dedicated secondary conduit from the reactor to the sensor array to prevent brownouts during full scans.
Wiring constraints worth noting:
- Each conduit segment adds a small heat load to the network
- Cross-grid bridges (between disconnected hull sections) require relay couplers, which can fail under surge load
- Power does not flow through airlocks when they are sealed, so evacuate-through-airlock emergency procedures can strand systems in unpowered sections
Installation costs scale with reactor tier and current hull value, so redesigning a fully fitted ship later is rarely cheap. Plan the power backbone before you start decking out crew quarters, otherwise the crew guide advice on duty rotations will not save you from a chronically overheated engineering deck.
Reactor Failure Modes and Emergency Response
Even well-maintained cores fail. Knowing the failure modes ahead of time turns a potential hull-loss into a survivable incident, and the right response depends on which alarm is going off.
Common Failures
| Failure Mode | Trigger | Warning Signs | Crew Response |
|---|---|---|---|
| Fuel starvation | Locker empty, transfer blocked | Output drops to zero | Refuel locker, restart core |
| Heat scram | Core exceeds 90% ceiling | Warning beep, output cut | Cool radiators, vent rooms, manual restart |
| Containment breach | Fission/antimatter damage spike | Smoke, radiation alarm | Evacuate room, seal bulkheads, eject core if possible |
| Solder fatigue | Sustained high heat over time | Increasing maintenance alerts | Swap component, cool hull, repair welds |
| Cascade brownout | Total draw exceeds output | Non-priority rooms lose power | Shed load (turn off shields, sensors) |
Crew competence matters here, which is why the crew management side of ship operations intersects with reactor care. An untrained engineer may misread a scram warning and vent the wrong room, while a veteran engineer will isolate the failing core, reroute power, and restart the plant in under a minute. For crews in deep salvage operations far from friendly ports, investing in a competent engineer pays for itself the first time something goes wrong during a long burn.
Emergency Protocols
Standard emergency procedure shared across community channels looks like this:
- Identify – read the alert, check core temperature and fuel state
- Isolate – seal bulkheads around the reactor room to contain any breach
- Cool – open vacuum vents, reroute coolant, power down non-essential systems
- Restart – once temperature drops below 60%, manually restart the core from the engineering console
- Report – log the incident so the crew chief can schedule a full teardown at the next port
Following these steps cuts mean recovery time roughly in half based on community reports from long-haul salvage crews. Most captains in the official Discord channels keep a printed copy of these protocols taped to the engineering console because the alarms come faster than the crew can think when things start going wrong.
Reactor Builds for Common Ship Roles
Different missions stress the power plant in different ways. Below are three common archetypes drawn from community testing and the official wiki's ship-building reference. None of them is universally optimal, but each one is field-proven for its intended role.
The Starter Hauler
Most new captains fly a salvaged hauler with a Tier 1 fusion core. Budget is tight, fuel is what you can pull from derelicts, and heat management is rarely an issue. Suggested setup:
- Tier 1 fusion core (2×2, ~35 kW)
- Two solid-fuel lockers flanking the core
- Single Mk I radiator on the dorsal hull
- No engineer on shift – the core runs unattended
Output is enough for low-power cruising, a single mining laser, and basic life support. When the credit balance improves, the hauler graduates to a Tier 2 core and a second radiator. This is the configuration most players run during their first ten hours with the game, and it teaches the fundamentals before any expensive upgrade locks you into a specific playstyle.
The Combat Skiff
Pilots who run armed escort or patrol work need burst output for shields and weapons. The community-recommended build pairs a fission-burner core with dedicated radiators and an engineer on rotation.
- Tier 2 fission-burner (1×2, ~85 kW peak)
- Uranium rod locker with two spares
- Two Mk II radiators mounted on dorsal and ventral hull
- One trained engineer on shift for scram recovery
This build keeps shields online during evasive burns, feeds dual plasma turrets without brownout, and shrugs off the kind of spike loads that cook a fusion core. Heat is the constant worry, so radiators get checked every shift and the engineer keeps a backup coolant loop primed for emergency venting.
The Exploration Cruiser
Late-game explorers flying far past K-Leg into uncharted sectors want sustained output and reliability. Antimatter cores dominate this niche:
- Antimatter reactor (3×3, 150+ kW)
- Shielded pod locker with three spares
- Four Mk III radiators in a balanced hull pattern
- Senior engineer plus a backup on rotation
The cruiser runs full sensor suites, life support for six crew, and a defensive turret array without breaking a sweat. The trade-off is the enormous upfront cost and the constant need for rare fuel, which keeps this build in the hands of established captains with deep credit reserves and reliable supply chains. For anyone planning multi-system expeditions, the antimatter core is the only realistic option despite the logistical overhead.
Frequently Asked Questions
What is the best reactor for a new player in Ostranauts?
Start with a Tier 1 fusion core because it runs unattended, uses cheap deuterium pellets, and tolerates beginner mistakes in heat management. Save fission and antimatter cores for after you have a trained engineer on crew and a solid radiator setup.
How do I refuel a reactor mid-flight?
Park a fuel locker adjacent to the reactor and drag fuel units into it from cargo, then toggle the auto-feed switch on the engineering console. For remote lockers, an engineer must reroute the fuel line manually each time.
Why does my reactor keep scramming during combat?
Scram triggers when core temperature crosses roughly 90% of its ceiling. Combat spike loads from shields and weapons push the core hot fast. Add more radiator panels to the outer hull and shed non-essential systems during the fight to keep temperature in the safe range.
Can I swap a reactor without rebuilding the entire ship?
Yes, as long as the new core fits the existing grid slot and adjacent fuel lockers remain compatible. A fission core dropping into a fusion slot usually requires a locker swap and a wiring check, but the hull structure stays intact.
What happens if my reactor runs completely dry in deep space?
The core shuts down cleanly without exploding, but every powered system on the ship goes dark. Without life support, crew suffocation timers start ticking. Always carry at least one backup fuel locker for emergency transfer, especially before any long-range flight away from resupply points.