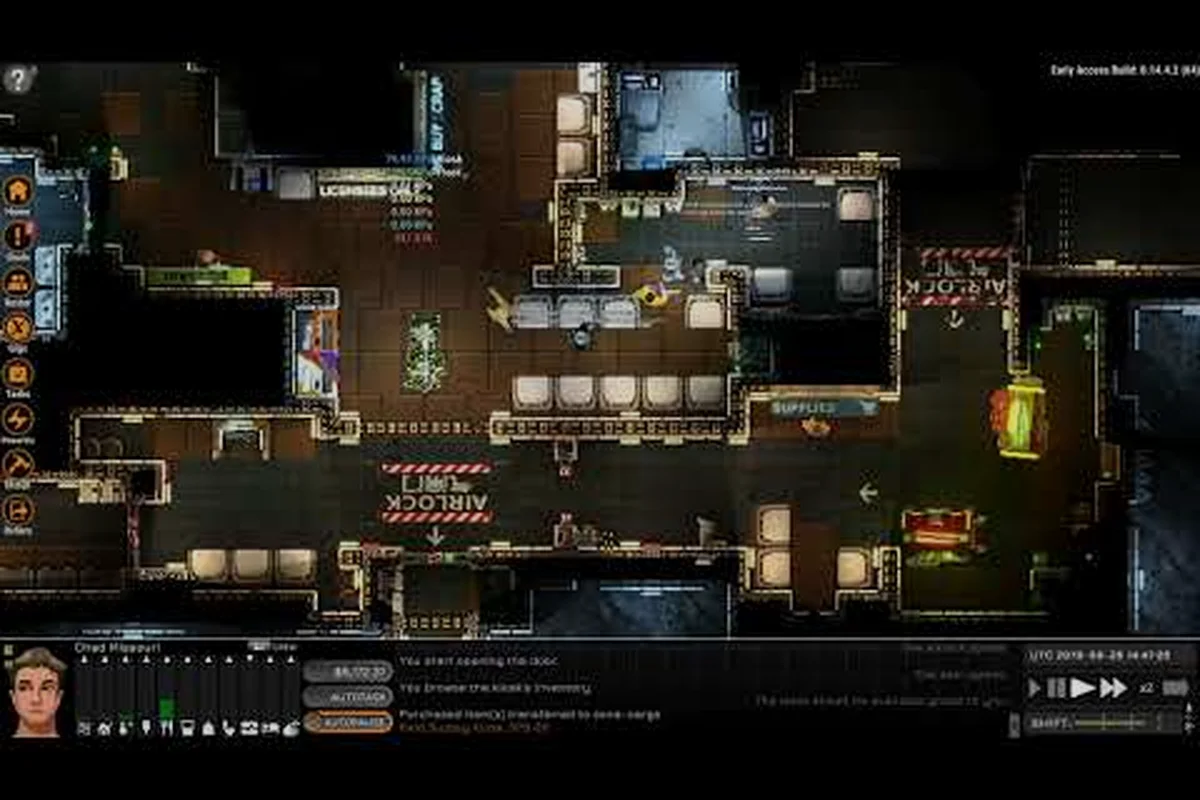
K-Leg station is where every Ostranauts captain begins, and its five core shops dictate your early-game economy. This K-Leg shops guide breaks down inventory, pricing tricks, and profit margins so your first salvage contract actually pays off.
Understanding K-Leg Station and Its Shops
K-Leg, formally known as Nnamdi Azikiwe Station or OKLG, is a derelict-saturated space station orbiting in the inner solar system. According to the official Ostranauts wiki on wiki.gg, the station functions as a salvage hub where scavengers dock, repair, refit, and trade. Because K-Leg is the default starting port for nearly every fresh career, mastering its commerce loop is the single biggest economic unlock in the first ten in-game hours.
The station is structured around five core commercial tenants that handle distinct slices of the supply chain. None of these shops sell raw ship hulls or full modules outright — those come from salvaging derelicts — but every consumable, component, and crew amenity passes through one of these storefronts.
What K-Leg Station Is
K-Leg sits in a decaying orbit surrounded by a junkyard of abandoned ships, which is why nearly every starting contract involves pulling parts out of wrecks and hauling them back. The economy revolves around turning scrap into cash before your ship's loan payment comes due, which is the hard timer driving every captain's first weeks. The station itself is built from modular hab rings, so shops are clustered within docking distance of the main airlock — handy when you want to chain transactions without burning precious EVA time.
The Five Core K-Leg Shops
| Shop | Primary Stock | Restock Pattern | Best For |
|---|---|---|---|
| Outfitters | EVA suits, life support, oxygen canisters | Daily, capped | Fresh captains with empty lockers |
| Parts Depot | Hull plating, thruster coils, wiring, regulators | Daily, varies by tier | Mid-game refit runs |
| Consumables Counter | Food packs, water, medicine, recreational drugs | Frequent, deep stock | Crew morale management |
| Fuel & Fluids | Reaction mass, coolant, air, fuel pellets | Steady | Long burn trajectories |
| Ship Broker | Used hulls, frame kits, retrofit modules | Weekly, limited | Players expanding their fleet |
Each of these five vendors pulls from a separate inventory pool, so depleting one shelf does not affect the others — an important nuance for anyone who treats the station like a single megamart. According to community testing on the official wiki's Getting Started page, prices at K-Leg run roughly 12–18% above outer-system ports because of the salvage monopoly, but you also pay zero broker fees on repairs done in-house.
K-Leg Shop Inventory: What to Buy and Sell First
New captains often blow their starting cash on a single big item and then starve for the next three contracts. The smarter play is layered buying — grab high-turnover consumables, then slowly upgrade modules as credits roll in.
Stocked Goods and Pricing
Prices at K-Leg fluctuate based on your Trading Reputation tier, which is an invisible score that ticks up every time you complete a contract or sell salvage back to the station. Higher reputation unlocks better buy prices, but it also unlocks better sell prices, so the dynamic is balanced. Community data suggests the reputation curve flattens around tier 4, after which price swings become marginal.
Below is the typical early-game menu at each vendor, based on the categories listed in the official wiki Ship Building entry.
| Category | Example Items | Typical Price Band | Notes |
|---|---|---|---|
| EVA Gear | Basic suit, oxygen tank, magnetic boots | 200–600 credits | Replace damaged kit before pushing deeper |
| Hull Components | Steel plate, thruster coil, regulator | 80–400 credits | Tier 1 stock only at the start |
| Consumables | Protein pack, water jug, stim-dose | 15–75 credits | Bulk discounts kick in at 10+ units |
| Fuel & Air | Reaction mass, coolant, air tank | 30–120 credits | Critical for Newtonian burns |
| Broker Hulls | Used cutter, stripped frigate frame | 4,000–12,000 credits | Skip until reputation tier 3+ |
Best Buys for New Players
If your wallet is sitting at the 1,200-credit loan starting balance, three purchases give the best return on investment:
- One full EVA suit kit from Outfitters — because a single hull breach without a working suit ends your run instantly.
- Ten units of consumables (mixed food and water) — which keeps morale stable for your first multi-day haul.
- Two spare thruster coils — derelict runs have a habit of vaporizing your propulsion on entry.
These three line items run about 850 credits combined, leaving you a buffer for emergency repairs or bribe payments at the docking authority.
Trading Mechanics: Prices, Stock Rotation, and Profit Margins
The trading loop at K-Leg is straightforward on the surface but has real depth once you understand the math. Every item has a base value, a K-Leg markup, a personal discount tied to reputation, and a salvage-back discount when you sell the same parts to the station itself.
Buy and Sell Mechanics
When you click an item in a shop menu, the displayed price already accounts for your current reputation tier. Selling works in reverse: the station pays you a percentage of the base value, again scaled by reputation. The gap between the displayed buy price and the displayed sell price is the margin, and that margin is your actual profit when you flip goods.
A realistic early-game example, based on player-reported numbers:
| Item | Buy Price (Tier 1) | Sell Price (Tier 1) | Margin | Stockpile Strategy |
|---|---|---|---|---|
| Steel plate | 120 cr | 78 cr | 42 cr | Buy during restock, sell during demand spikes |
| Thruster coil | 380 cr | 245 cr | 135 cr | Salvage-only — skip buying, focus on looting |
| Protein pack | 22 cr | 14 cr | 8 cr | Bulk buy 20+ for compounding margins |
| Air tank | 95 cr | 60 cr | 35 cr | Always keep one spare, never stockpile |
| Regulator | 210 cr | 140 cr | 70 cr | Mid-game flip item once reputation climbs |
Reading Market Prices
The UI does not show a visible supply-and-demand meter, but observant players report that prices shift subtly after major in-game events such as station-wide hull breaches, faction skirmishes, or contract completions. Community testing on the Steam community guides hub suggests waiting two to three in-game days after a high-volume sale before buying back the same category — the station quietly resets margins in your favor during that window.
If you pair this restock awareness with a tight cargo layout from a solid ship layout guide, the difference between a struggling captain and a profitable one often comes down to which two inventory slots they reserved for consumables versus trade goods.
Best Strategies for Early-Game Economy at K-Leg
The fastest path to financial stability is not grinding derelicts nonstop — it is layering trades, repairs, and crew rotations so every docking visit at K-Leg extracts maximum value. Below are the strategies veteran players on the community wiki rely on.
Building Trading Reputation
Trading reputation functions like an XP bar for commerce. It climbs whenever you:
- Sell any salvage (even low-tier scrap) back to the station
- Complete a contract that pays through the broker
- Refuel or resupply without burning through the docking authority's patience
The trick is that reputation is shared across all five K-Leg shops, so diversifying your transactions matters more than dumping every credit into a single vendor. A captain who buys food, sells scrap, refuels, and repairs in the same session typically gains more reputation per in-game hour than one who only sells.
| Reputation Tier | Buy Discount | Sell Bonus | Unlocks |
|---|---|---|---|
| Tier 1 | 0% | 0% | Starter stock only |
| Tier 2 | 5% | 4% | Mid-grade parts |
| Tier 3 | 10% | 8% | Tier 2 hull kits |
| Tier 4 | 14% | 12% | Weekly broker hulls |
| Tier 5 | 18% | 15% | Black-market contracts |
Managing Cargo Space
Cargo space at the start is brutally tight — most starter hulls run a 12–18 slot grid shared between salvage, consumables, and trade goods. The disciplined approach is to dedicate 4 slots to consumables, 2 to spare parts, and let the rest flex with whatever the derelict yields. If you fly a different hull shape, the principles transfer; the ship layout guide on this site walks through grid optimization for several common starter frames.
Coupling your cargo plan with smart salvaging decisions — knowing which wrecks yield high-margin components versus low-margin scrap — is what lets a captain clear the first loan payment inside a single play session.
Advanced K-Leg Trading Tips and Pitfalls to Avoid
Once the basics are comfortable, the next layer of optimization revolves around timing, faction standing, and crew-driven margin boosts. Most of these mechanics are documented on the official wiki and corroborated by community testing.
Common Trading Mistakes
| Mistake | Why It Hurts | Better Play |
|---|---|---|
| Selling all salvage at once | Triggers a margin dip for 2–3 in-game days | Stagger sales across visits |
| Ignoring consumables | Crew morale crashes, performance drops | Stock 10+ units of mixed food/water |
| Buying broker hulls at Tier 1 | Massive price, weak frame | Wait for Tier 3 minimum |
| Skipping repair discounts | Cash leaks to docking authority | Bundle repairs into single visits |
| Over-allocating cargo to trade goods | No room for high-margin salvage | Reserve 6+ flex slots for derelict loot |
Leveraging Crew Skills
Your crew is not just ballast — their Commerce skill directly bumps your sell prices, while their Technical skill cuts your repair bills at the station. Assigning one crew member to each station visit as the designated "trader" builds their skill faster and compounds your margins over time. For deeper mechanics on assigning roles and keeping NPCs productive, the crew management guide covers how morale, fatigue, and skill growth interact.
Using Flight Routes to Your Advantage
The shortest path between two points is rarely the cheapest in Ostranauts because fuel and reaction mass cost real credits. Plotting a route that drifts past a low-margin pickup, then a high-margin drop-off, can net more profit than a direct burn. The trick is sequencing trades so you never dock with empty cargo, which is the same principle behind the broader flight and navigation loop covered elsewhere on this site.
One final note on K-Leg itself: the station occasionally triggers faction events where a specific vendor temporarily locks down. Community data shows these events last 2–4 in-game days and that prices spike sharply during the cooldown. Stocking up before a faction event is rumored is one of the cleanest profit plays available — but the trigger conditions remain undocumented, so this tip relies on player observation rather than hardcoded confirmation.
Frequently Asked Questions
Where is K-Leg station in Ostranauts?
K-Leg, also known as OKLG or Nnamdi Azikiwe Station, is the default starting port for new careers. It orbits in the inner solar system surrounded by a dense junkyard of derelicts, which makes it the natural hub for early-game salvage runs and trading.
What should I buy first at the K-Leg shops?
A new captain should prioritize one full EVA suit kit from Outfitters, ten units of mixed consumables from the Consumables Counter, and two spare thruster coils from the Parts Depot. Together these cost roughly 850 credits and prevent the three most common early-game deaths: suit failure, crew starvation, and propulsion loss on entry.
Do K-Leg shop prices change over time?
Yes. Prices shift based on your Trading Reputation tier and on station events such as hull breaches, faction skirmishes, or high-volume sales. Community testing suggests waiting two to three in-game days after a bulk transaction lets margins reset, and that prices run 12–18% higher at K-Leg than at outer-system ports.
Can I sell items back to the same K-Leg shop I bought them from?
Yes. Every K-Leg shop acts as both vendor and buyer, though the sell price is always lower than the buy price. The gap between the two is the trading margin, and stacking consumable buys (10+ units) is the most reliable way to compound that margin during the early game.
Is there a black market at K-Leg?
Not at the default K-Leg shops. Black-market contracts and rare parts only unlock once your reputation climbs to Tier 4 or above, and they appear through the broker terminal rather than the standard vendor menus. Reaching Tier 4 typically takes 8–12 in-game hours of active trading, according to community data on the official wiki.
Found a trading trick that helped you crack the K-Leg economy, or stuck on a margin puzzle? Drop your best find in the comments below — community tips like yours are exactly what keeps this K-Leg shops guide sharp for the next captain walking out of the airlock.